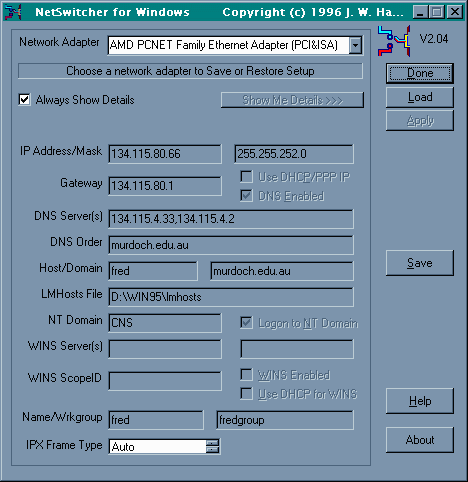
Select the "Save" button. You will be prompted for a filename, type in Murdoch Campus. Close the NetSwitcher program by select the "Done" button.
Download and install itÖ
To save your Murdoch Campus configuration,
start the NetSwitcher program. From the Start Menu, select Programs, then
select NetSwitcher, and finally select the NetSwitcher program. You should
see something like this:

Select the "Save" button. You
will be prompted for a filename, type in Murdoch Campus. Close the NetSwitcher
program by select the "Done" button.
Rockingham
Similarly to the above Murdoch Campus
settings, reconfigure your TCP/IP protocol to the Rockingham Campus settings.
(Once again if you are unsure of the settings contact your IT Support Person).
When your machine has rebooted and has been tested and works fine for the
Rockingham Campus network, execute the NetSwitcher program. You should
see a similar picture to the one above, but it will have all of your Network
Settings for the Rockingham Campus.
Select "Save" and type in Rocking Campus. Then select "Done".
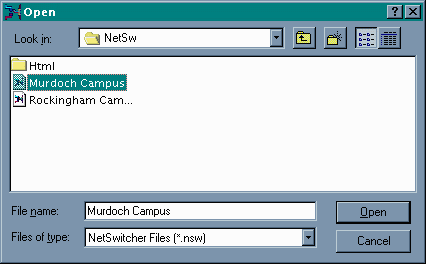
To reconfigure your laptop, select
the "Load" button. It will open a dialog box, where you should be given
a list of .nsw files. Select the murdoch campus file if you are on the
South Street Murdoch campus and the rocking campus file if you are at the
Rockingham Campus. Then select the "Open" button from the dialog box.

When you return to the main screen of the NetSwitcher program, select the "Apply" button.

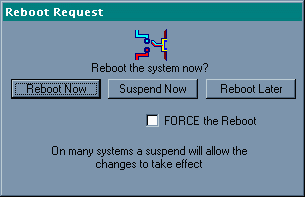
The system will prompt you (as shown above) to reboot. You should select "Reboot Now" to make the network settings come into effect.
After you machine has rebooted, you will be ready to use your laptop on the network for the campus you selected.